Account Plans

Account Plans

How to add new plans and editing existing ones

Account Plans

Navigation

Navigation

To start, navigate to:

  • Settings
  • and then select Priority Account Plans

Add New Account Plan

Add New Account Plan

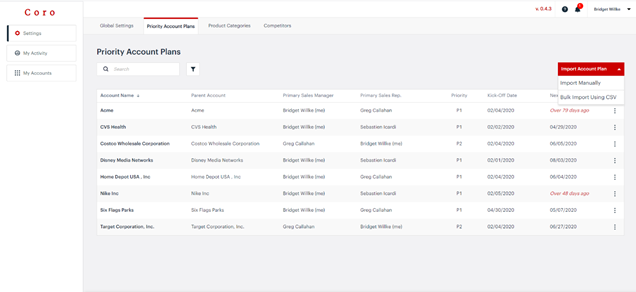
  • To add an account in Coro, select Import Account Plan
  • Select either:
    • Import Manually (individually) or
    • Bulk Import using CSV (multiple at a time)

Import Manually

Import Manually

Setting up accounts 1 by 1 is typically done when a limited number of accounts are required.

  • Select Import Manually, the import account interface will appear
  • Select the account you would like to add. You can do so either by the:
    • Account ID
    • Account name (typically the easiest), or
    • Parent Name
  • Select the Priority Level: P1 or P2
    • The type of information and frequency of reviews can be adjusted within Global Settings
  • Set the Account Kick Off Date
    • The Next Review Date will be automatically updated based on the frequency you want P1 and P2 accounts to be reviewed - Set in "General Settings: Set-up"
    • NOTE: If you set the Kick Off Date at a future date, the account plan may not be visible in Coro until that noted date
  • Select Next
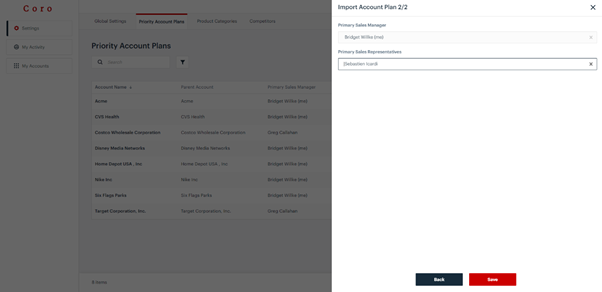
  • Select the Primary Sales Manager
  • Select the Primary Sales Rep
    • The Primary Sales Manager and Primary Sales Rep are the individuals that will "submit" the account plan for approval (Primary Sales Rep) and "approve" the account plan (Primary Sales Manager)
    • Troubleshooting: Sales Rep/Manager not available in the Drop Down:
  • Select Save

Bulk Import Using CSV

Bulk Import Using CSV

Setting up multiple accounts at once:

  • Select Bulk Import Using CSV
  • Select download Empty CSV file
  • Enter the required information into the CSV file. Save it to your personal device.
    • Salesforce Account Number - See Account Number in Account Fields for additional information
    • Account plan name
    • Account Priority level - Select "1" for Priority 1 and "2" for Priority 2
    • Enter Account plan kick off date
    • Enter next review date
    • Primary Manager ID - See Find Salesforce ID for more information
    • Primary Sales ID - See Find Salesforce ID for more information
    • Action
      • If adding a new account, type ADD
      • If editing an existing account, type UPDATE
  • Once complete, go to Coro
  • Select Upload CSV file and select the prepared file
  • Once upload, scan the changes to confirm they have updated correctly

Edit existing Account Plan

Edit existing Account Plan

Editing or deleting an account is easy:
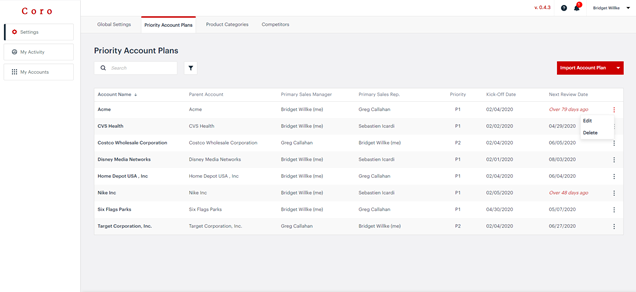
  • Search for the account you want to edit. To search, scroll manually, filter the accounts using the header, or type the name of the account into the search field
  • Select the ellipses (3 dots) to the right of hte target account
  • Select Edit or Delete
  • If Editing, make the target changes to the account and select Save