Coro Deployment
Introduction
Introduction
- Coro – 100% native on Force.com
Coro has been built natively on the Force.com platform. This means that it integrates tightly with customer data, and takes advantage of the powerful features of Force.com. It is delivered to you as an app installed in your Salesforce.com org. There are no external dependencies on third-party web services or applications. Coro is a Managed Package application, which means it doesn’t count against limits on your custom apps, objects, and tabs. - Security Considerations:
Please reference the Coro Security documentation for all security related questions. - Prerequisites for Installation
Please ensure that the following prerequisites are in place before you begin the installation process: - Salesforce Lightning: either Enterprise, Professional, Developer or Unlimited (incl. Performance Edition)
- Installation Package
Installing Coro, involves one package: - Coro Core Installation Package: This package contains the core functionality of all Coro solutions. It is a prerequisite for all Coro solutions, and must be installed as the first step.
- Coro Licensing: Once the Core Installation Package is installed, the Coro team will connect to your org, which will make the functionality available in your org
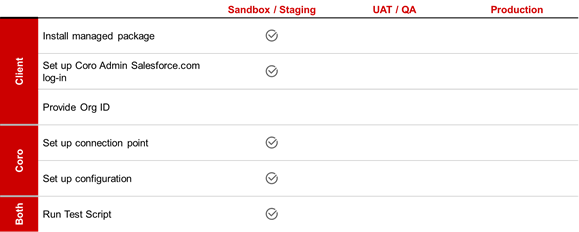
- Workflow for installation: Installation will vary based on your environment. Typical, installation includes: Sandbox/Staging, UAT and Production. Below are the standard steps required for each environment.
Once the package is installed in each environment, please reach out to the Coro@Bain.com to set up time for the final steps. To accelerate the deployment, please have the following available for each environment: - Coro specific Salesforce ID for each environment that is being tested: To connect Coro to your environments, please create a “Coro Admin” ID within Salesforce. This ID must have full read and write permissions. It is typically easiest to set up the ID as system admin
- Note: Coro features are currently supported only in Salesforce Lightning mode. If you are using it in Classic, please reach out to Coro@Bain.com for further support.
Install the Coro Core Package
Install the Coro Core Package
To install the Coro Account Planning program, you begin by installing the Coro Core application package.
Prepare your organization to install the Salesforce package
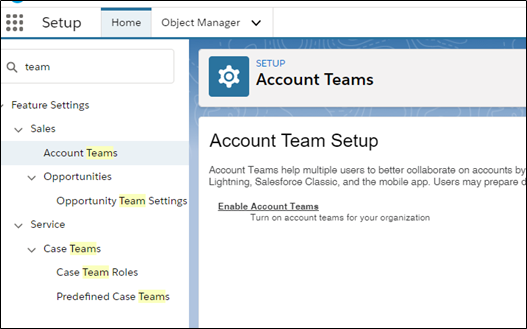
- Enable Account Team
- Go to “Setup” and in the quick find box enter : “ Account Teams ” and click on it.
- In the Account Team Setup window, click on “ Enable Account Teams ” if it is not enabled yet.
A Salesforce admin will install the package for Admins:
- Open the download link (for v1.14)

- Check the box “ ‘I acknowledge that I’m installing a Non Salesforce Application that is not authorized for distribution as part of Salesforce’s AppExchange Partner Program”’ and click on “Install”.
- Click on “Install”
- After a successful installation you’ll see the following window:

- Click on “Done” and this will automatically redirect you to the list of installed apps.
Create public Site
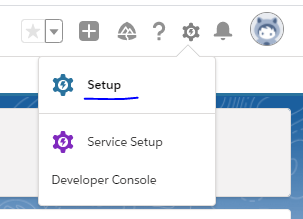
- Press on “Settings” icon in top right corner and click on “Setup”
- On the left pane, type “sites“ in search bar and click on “Sites“ under “Sites and Domains“
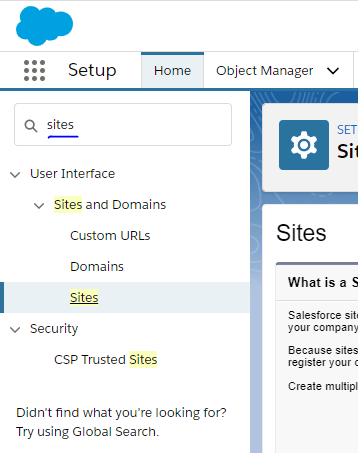
- In the middle window at the bottom, find table “Sites“. In case you didn’t register the Site yet, proceed with Site creation by pressing New button, otherwise, press Edit and proceed with instruction from point 9.
- Insert the required fields marked with red color:
- Site Label
- Site Name
- Site Contact
- Default Record Owner
- Active Site Home Page (eg. “InMaintenance”)
- Inactive Site Home Page (eg. “InMaintenance”)
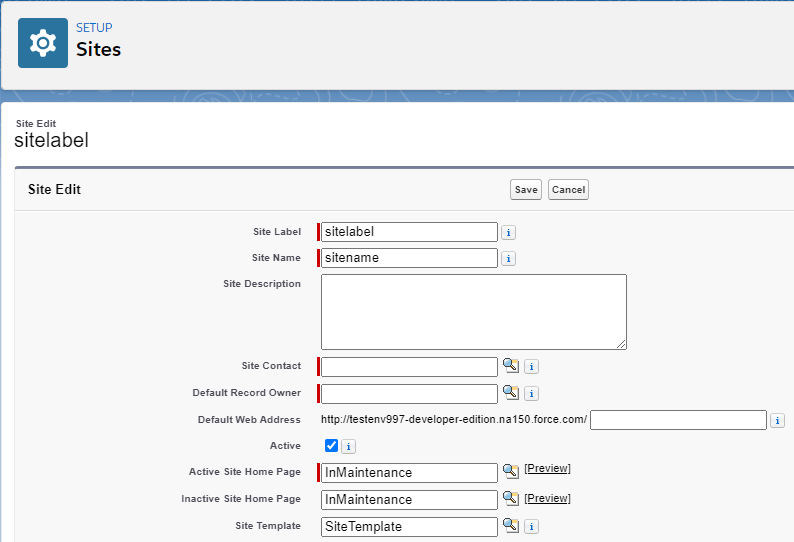
- Go to the “Site” details page by pressing on Site’s "Site Label"

- Press “Public Access Settings“ button

- “Profiles” page will be opened, here go to “Apex Class Access”
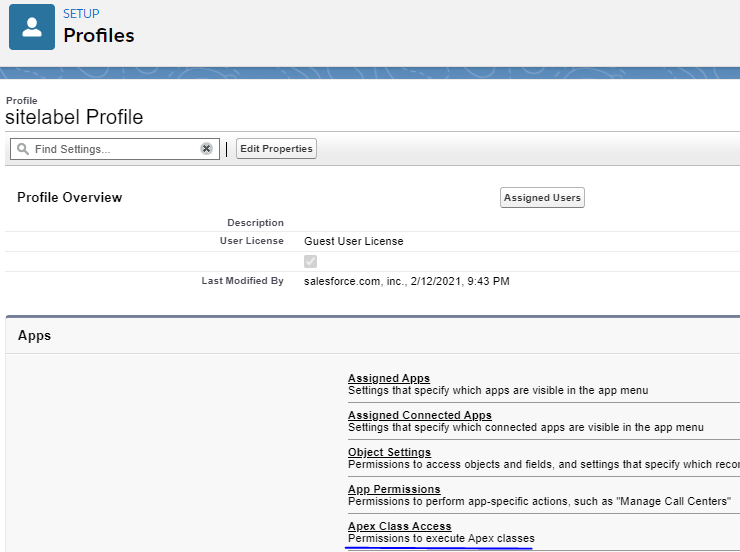
- We need to add two classes here, press Edit
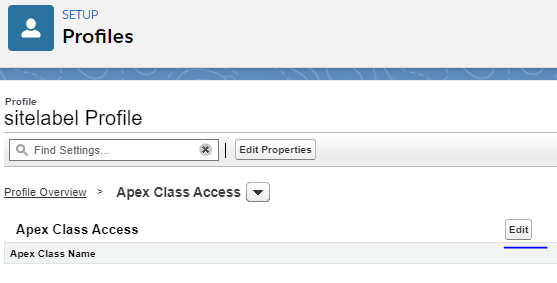
- Move “coro.UserTokenManager” class to “Enabled Apex Classes” column. For Pre-Production and Production environments, select “coro.CoroComponentController” as well

- Press “Save” and go back to “Sites“ on the left pane (search “sites”)
- “Activate” the “Site”

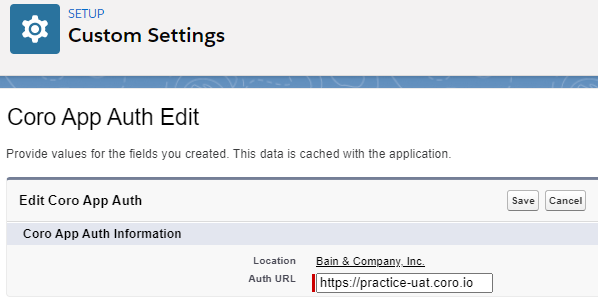
- Note: Coro app url is ‘https://app.coro.io’ by default. The Coro Admin will provide you the updated URL. If you have not been provided it, please contact (Coro@Bain.com). Use the following steps to update the URL.
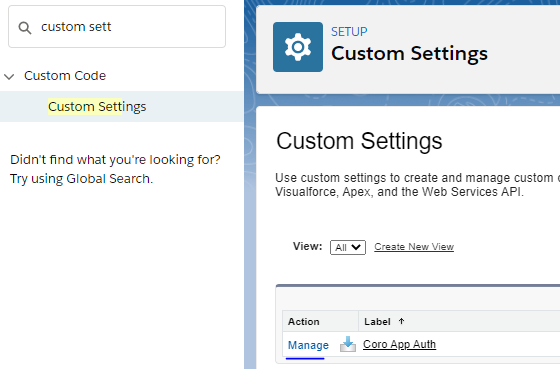
- For Production/Pre-production search for “custom settings” on left panel
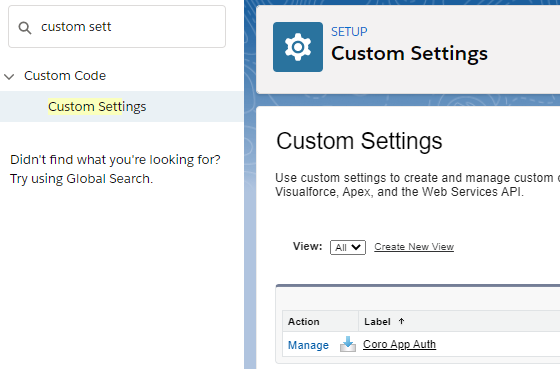
- Click “Manage” next to “Coro App Auth”
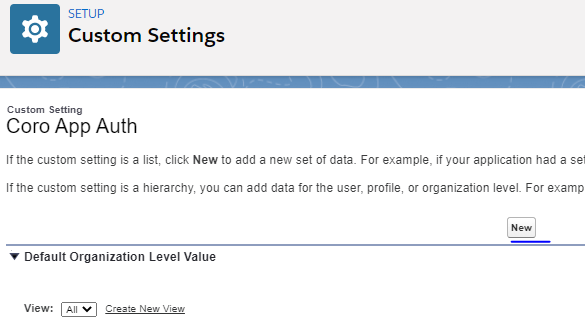
- Click “New”
- Insert Custom Domain provided from Coro Admin (Coro@Bain.com) and hit “Save”.
Set System Administrator field access
- Search for “user management“ on left pane and go to “User Management Settings“.
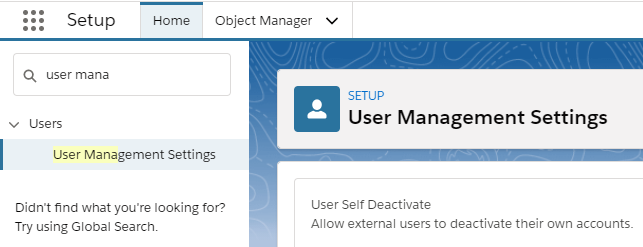
- Ensure that “Enhanced Profile User Interface” is enabled

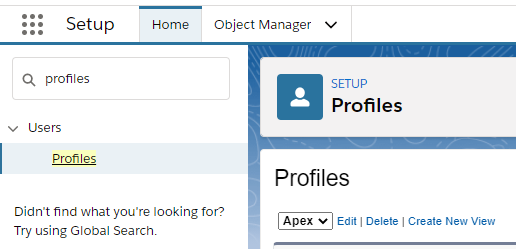
- Next search for “profiles“ on left pane
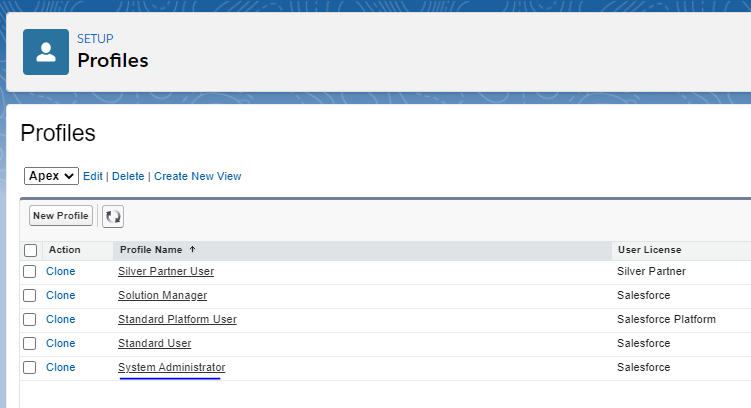
- Search for “System Administrator” account and open it
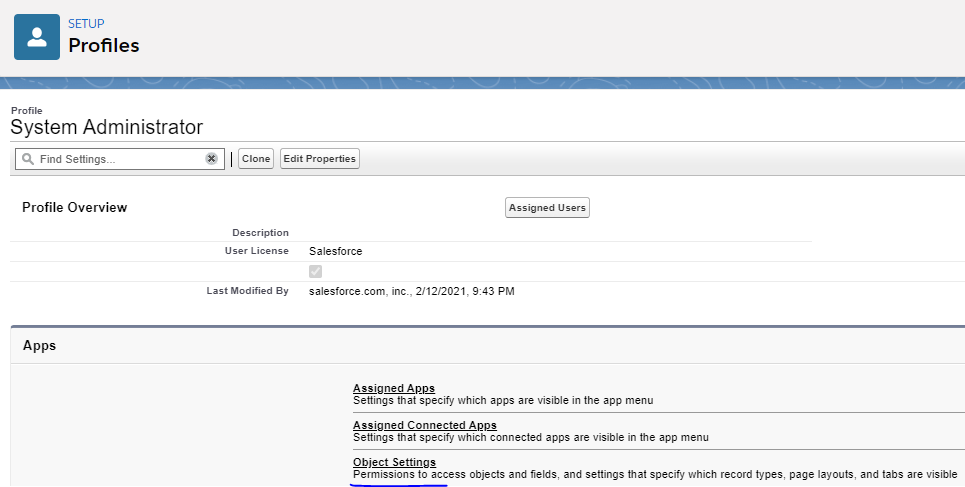
- Select “Object Settings”
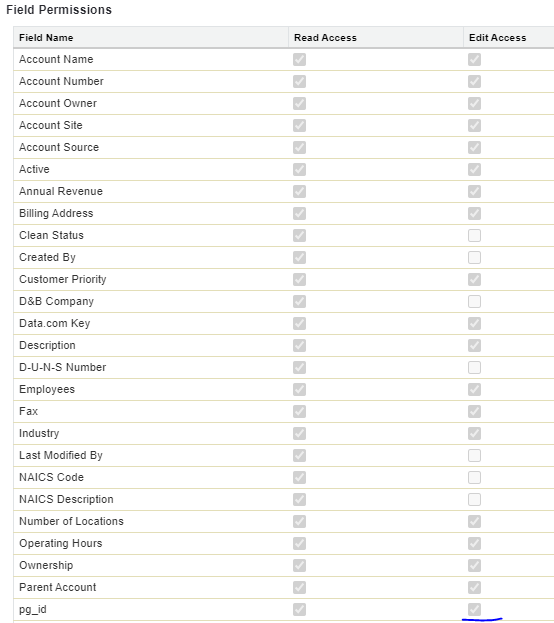
- Open each object shown in Salesforce list according to the list provided below in the document and make sure that this user has the “Edit“ permission for following field present.
- Account:
- Pg_id
- Contact:
- Pgid
- Opportunity:
- Account Plan
- Budget Confirmed
- Discovery Completed
- Lastupdate
- Loss Reason
- ROI Analysis Completed
- UpdatedAt
- UpdatedBy
- Account:
- Example of the “Accounts” object
- Provide access to the following custom objects and their fields:
- Account Plan
- Account Plan Product Category
- Ambition
- Category
- Competitor
- Competitor Landscape
- Financial Goal
- Financial Historical Value
- Key Action
- Opportunity Pipeline
- Pillar Required Contact
- Play Required User
- Power Base
- Relationship Play
- Sales Play
- Sales Play Contact
- Sales Play Product Category
Set up Account Team roles
Coro uses the “Account Team” at the parent hierarchy to provide access to the Coro application on an account by account basis. If your organization does not use the standard “account team” feature, please reach out to the Coro team (Coro@Bain.com) to figure out an alternative option and proceed to section 2.1.5.
- Situational: Add Account Team roles
- The following Account Team roles are optional for the application:
- Sales Manager
- Sales Rep
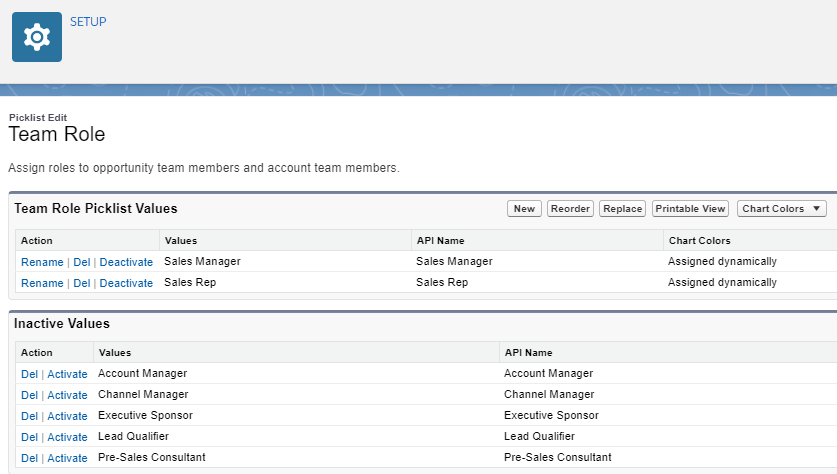
- In order to add them, go to the “Account Teams” in the Setup menu and click on “Team Roles”

- Situational - if you don't use "Roles": Add the required team roles and deactivate all the others. As a result you'll have two active team roles in the list: [You don't need to deactivate]
- The following Account Team roles are optional for the application:
Add a Sales Op checkbox on the User page layout
- Go to "Setup"
- Select "Object Manager"
- In the search box, type "User" and select
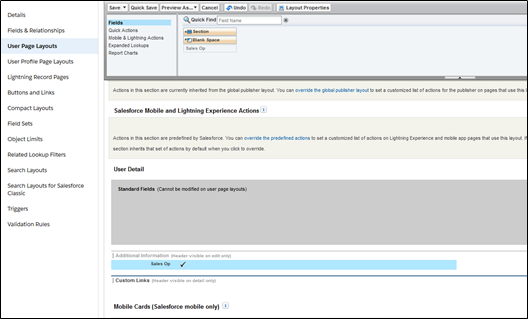
- On the left side choose the User Page Layouts
- To the right, select the page layout that is "active". (There is likely only 1 option.)
- At the top of the page, you will see a series of boxes underneath the “quick find” box.
- Select “Sales Op” and drag it into the “Additional Information” section.
- Once the “Sales Op” button is in the “additional information” section, click “Save”
Define Sales Op users:
These steps should be implemented for all the users that are going to have a Sales Op access in the application.
- Go to "Setup"
- Enter "users" into the search bar
- Open the list of users
- Open details per specific user and click on "Edit"

- Set the Sales Op checkbox to "checked"
- Click on "Save"
Define teams for Accounts:
These steps should be implemented for all accounts.
- Open the account details record.
- In the related list find the "Account Team":
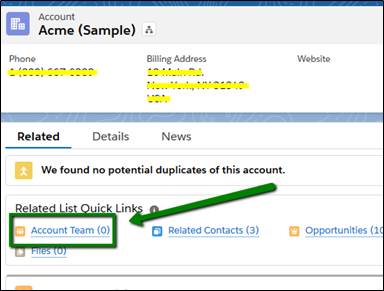
- Click on "Add Team Members" and choose the appropriate user and his role for the specific account: Account Access, Case Access and Opportunity Access may be left as they are.

Provide access to reports:
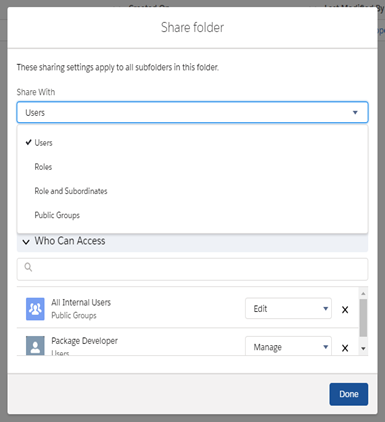
Share the Account Team Reports folder with users.
- Go to "Reports" and select "All Folders"
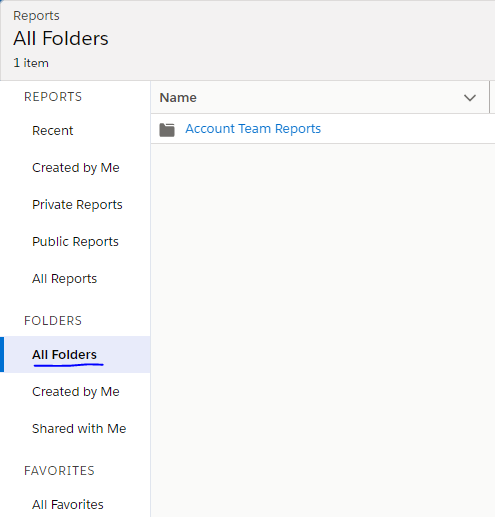
- Click on the arrow next to the "Account Team Reports" folder and choose "Share"

- Pick Users, Roles, Groups to provide an access to the folder, choose the access level, click on "Share" and finally on "Done."
Once complete, proceed to Activate Connection with Coro